MacBook died again

Last Monday, while I was at work, performing a network-based backup using Mistral Backup my MacBook stopped responding.

I powered it off and when powered back on just got the dreaded Question Mark Folder. I went through the usual diagnostic steps, resetting PMU and PRAM, reseating RAM and hard drive, but I knew the hard disk was dead. When the power was first applied it made 4 clicking noises and didn’t spin up.

I called Apple Support as the machine is still only a few months old and well within warranty. They agreed that the drive was dead and that I would need to take it to either an Apple Store or a local Authorised Apple Service Provider. I called a couple of local service providers but none of them had the 80GB 2.5in SATA drive in stock, so I decided to take the machine to the Apple Store on Regent Street.

Now the Apple Stores run a “Genius Bar” system where you can get tech support, but it runs on a strictly appointment-only system. You have to book appointments online, on the Apple website. I checked and there were no appointments available that day.

I check the next morning, and once again there were no appointments available. I resolved to take the machine along to the Apple Store and see whether they’d take it in after I’d finished work.

On arriving at the Apple Store, there was quite a long queue at the Genius Bar. A store employee walked along the line to see whether he could weed any people out. When he reached me, I explained that my MacBook had died, that I’d spoken to the the support line and that the drive wasn’t working. They guy asked whether I had an appointment, to which I pointed out that asking people to make an appointment online to get their computer repaired was a little illogical (“Computer no work – must use computer to get it repaired…. hmmmm….”). He said that there was no way I’d get to see anyone that night, but he booked me an appointment for the following night. I’ve no idea why they couldn’t just check it in for repair, I’d had i diagnosed by the support line who had taken the serial number, so they knew it wasn’t a simple user problem.

The next evening, Wednesday, I took the machine in, got it booked in, they had no drives in stock either so might have to wait the standard 7-10 days, though the guy said that it’d probably be fixed sooner.

On Saturday afternoon I got a call to say that the machine was fixed, picked it up and started rebuilding it.

I’d lost all the data on the hard drive, but within 24 hours had virtually everything I needed back in place. I did a restore over my home ADSL line from the Mistral Backup server which got me most of my “Documents” folder back, and most of the other applications I use are available for download. My email is all stored on my IMAP server with Exonetric at Telehouse so I could access my license keys etc.

Getting the machine in for repair was a pain, but at least it didn’t take very long when they did take it in. The actual repair was a simple replacement of the hard drive, which is a 3 minute job (remove battery, loosen 3 screws, remove L-plate, pull hard drive tab, then do the same in reverse). The receipt I was given said that if the machine hadn’t been under warranty, it would have cost me £167. The cost of the hard drive is about £70, so they’re charging a fair stack for labour there.

The Mac’s been fine since, fingers crossed for he next few months. I might invest in an Apple Care contract when my warranty nears its end, as I’ve had two repairs since I bought the machine in late July.
MacBook Intermittent Shutdown Problems

About a month ago I bought myself a refurbished black MacBook from the Apple Online Store. Apart from a slight mark on the screen which isn’t noticeable in use it was in fantastic condition. I’ve been using it for the past month without any problems, and it’s been a fabulous machine.

Until Saturday. On Saturday evening, the machine suddenly shutdown. No error message, no kernel panic, it just turned itself off. Hmmmmm… I turned it back on and about 30 minutes later it shutdown again.

Turning to the web I found that I’m not alone. From what I’ve read this problem has been around for a while, and tends to occur when the machine is about a month old, though some people have suffered the problem within days of purchase.

It would appear that the problem is caused by an automatic CPU shutdown due to overheating. I can reproduce the problem by heavily loading both cores by entering “yes > /dev/null &” a couple of times in Terminal and waiting a minute.

The shutdown happens when the machine is heavily loaded and also when the machine is cool, for example after being asleep, and is then given a task which raises the workload rapidly.

The problem happens on battery or main power, it will even happen while running the extended Hardware Diagnostic from the installation DVD, which shows that it’s not an OS or other software problem.

The problem has got worse since Saturday, yesterday the machine shutdown 15 times. I’ve reset the PRAM (power on with Option-Cmd-P-R held down until the machine has chimed 3 or 4 times), reset the PMU (unplug, remove battery, hold power button down for 15 seconds), re-seated the RAM and none of them have helped.

The machine has had the SMC Firmware applied which fixes the fan “mooing” but it didn’t help with this problem.

This morning I called Apple technical Support and after explaining the tests I’d tried etc, the guy agreed that the machine needed a repair. Unfortunately their ticketing system was down so he couldn’t arrange it and I’d have to call back, but he did give me an “Offline” call reference. I called back a few hours later but the young lady who I spoke to could find no information about my previous call and the call reference couldn’t be found. So I went through the whole explanation again. She again agreed that the machine needs a repair and I was put through to a product specialist to arrange the Mail-In repair.

They’re sending a box for the machine which should reach me tomorrow.

From what I’ve read the repair tends to be either a Main Logic Board replacement which sometimes works, or a replacement of both the heat-sink and something called a “lollipop”. My machine is a “Week 21” machine (5th and 6th digits of serial number), but the problem has been reported for most manufacture weeks.

The one workaround that I’ve found is to turn the machine on by holding down the power button until the machine makes a loud, long beep. That starts the machine with the CPU locked to 1GHz (half the maximum speed) which seems to prevent the thermal shutdown until the machine is switched off again.

To give some idea of the scale of the problem, here’s a small sample of the articles relating to this problem:-

There are loads more reports, and the comments on some of the articles indicate that there are hundreds, if not thousands, of people suffering from this problem.

How to tell which version of Windows 2000 SP4 Update Rollup 1 is installed

Microsoft released two versions of the Windows 2000 SP4 Update Rollup 1 package, one which can cause machines using SCSI to blue screen on reboot, and one which doesn’t.

Unfortunately they didn’t provide any easy way to tell the difference (like a version number on the installation executable). If you’re converting a machine to run with SCSI (or virtualizing it as I am), you need to know which version is installed.

Here’s how:-

Look for “scsiport.sys” in \WINNT\system32\drivers

The BROKEN version in v1 is dated 29 Dec 2004 and is version 5.0.2195.7017

The FIXED version in v2 is dated 14 Jul 2005 and is version 5.0.2195.7059

If you boot the system with a SCSI device using the BROKEN version it will blue screen.

You can fix it by copying back “scsiport.sys” from \WINNT\$ntupdaterolluppackuninstall$ to \WINNT\SYSTEM32\drivers while in the Recovery Console or WinPE. Then install the newer version of the Rollup which can be obtained from Microsoft.

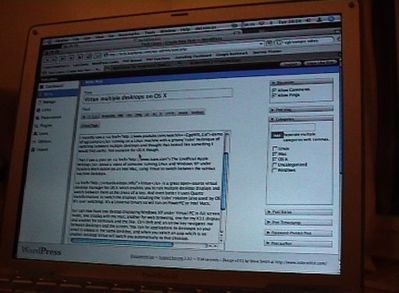
Virtue multiple desktops on OS X

Click for the video of Virtue in action

I’ve found one of the most useful add-ons for my Powerbook.
At work, I’m commonly juggling between Virtual PC, Microsoft Remote Desktop, my mail, a web browser, and maybe an X11 connection to my Linux machine at home.

On a 12″ screen with a resolution of 1024×768 pixels that’s a lot to get in a little space so I’d end up constantly minimising applications and switching windows.

I recently saw a demo of xgl/compiz running on a Linux machine with a groovy ‘cube’ technique of switching between multiple desktops and thought that looked like something I would find useful. Not available for OS X though.

Then I saw a post on The Unofficial Apple Weblog about a video of someone running Linux and Windows XP under Parallels Workstation on an Intel Mac, using Virtue to switch between the various machine desktops.

Virtue is a great open-source virtual desktop manager for OS X which enables you to run multiple desktop displays and switch between them at the press of a key. And even better it uses Quartz transformations to switch the displays including the ‘cube’ rotation (also used by OS X’s user switching). It’s a Universal binary so will run on PowerPC or Intel Macs.

So I can now have one destop displaying Windows XP under Virtual PC in full screen mode, one display with my mail, another for web browsing, one for my X11 display and another for terminals and the like. Ctrl-Shift and an arrow key navigates me between desktops and the screen. You can tie applications to desktops so your email is always in the same desktop, and when you select an app whcih is on another desktop Virtue will switch you automatically to that desktop.

It’s very neat, and I’ve made a short video file of Virtue in action. It’s a Quicktime .MOV file, about 800k in size.

Linux with no monitor

I have an old Linux machine with no monitor attached (i.e. headless) which I use as a server.

It was running an old version of Linux so I updated it to Ubuntu using the process to upgrade an existing Linux installation over a network connection. Worked like a dream.
At the end of the process I rebooted the machine but then realised that Ubuntu doesn’t run a ssh server by default.
I couldn’t log in on the console because I had no monitor and the default Ubuntu install boots to the Gnome GUI which is impossible to drive ‘blind’. Here’s how I sorted it.

  1. Open one of the alternate text terminals by hitting ctrl-alt-F2 on the machine’s keyboard.
  2. Enter your username, press return.
  3. Enter your password, press return.
  4. Enter sudo apt-get install openssh-server, press return.
  5. Enter your password, press return.

With careful typing, that should get you logged in and install and start the ssh daemon. You can then log in remotely.

Windows 2000 not able to access more than 128GB on hard drive

I found that to get more than 128GB of disk available on Windows 2000 SP3 (not sure about XP) you have to make a registry change to enable access to the full disk. This is due to a limit in Windows 2000 and its default ATA disk support.

Save the text between the lines below into a file called BigDisk.reg, double-click the file and reboot. You should now be able to access the whole disk. You should also check that your BIOS supports large disks, and look at updating your BIOS if not.

REGEDIT4
[HKEY_LOCAL_MACHINE\SYSTEM\CurrentControlSet\Services\atapi\Parameters]
"EnableBigLba"=dword:00000001

To save you the effort, I’ve also created the file for you – BigDisk.reg

OS X Client on trunked VLAN

The place I’m currently working has an IP telephony system. Each phone has an extra LAN port which you can plug a laptop into.

All very handy, but the port is trunked so plugging my Apple Powerbook 12″ into it doesn’t result in any sort of useful connection.

Googling around indicates that only OS X Server (10.3.3 onwards) has a GUI tool for configuring VLANs on an Ethernet port. The OS X client that you get on your iBook, iMac, Powerbook and PowerMac as standard doesn’t have anything obvious for VLAN support.

Digging further reveals that the standard Terminal ifconfig does support VLAN commands.

sudo ifconfig vlan0 create
sudo ifconfig vlan0 vlan VLAN-TAG vlandev en0
sudo ipconfig set vlan0 DHCP

The first line creates the VLAN pseudo device vlan0, the second line that connects that device to the physical ethernet port (in this case en0) and tells the machine which VLAN tag to use.

You will need to replace VLAN-TAG with the relevant VLAN tag which your network administrator should be able to supply you with.

The third line sets the vlan0 pseudo device to use DHCP. If you need to set up a static IP address use something along the following two lines instead:-

sudo ifconfig vlan0 inet 192.168.0.10 netmask 255.255.255.0

and then

sudo route add default 192.168.0.1

to set your default gateway.

When you've finished with the VLAN connection you can destroy the pseudo-device with:-

sudo ifconfig vlan0 destroy

The Ethernet port in my Powerbook 12" (2005 model) supports VLANs, and I suspect the ports on most recent Macs will be the same.