Adding a static route on VCSA 6.5

I recently upgraded my lab vCenter to the vCenter Server Appliance (VCSA) v6.5.

As I need a static route on my network, I went to add that in the same way that I’ve done for other VCSAs, only to find that the networking has changed.

VCSA 6.5 now uses systemd-networkd to control networking. Any attempt to use “service network restart” will generate a bunch of error messages about “exiting with error 6”. Editing files in /etc/sysconfig/network  will have no discernable effect.

So how do you add a static route under the new networking regime?

Log on to your VCSA using ssh (or the console) and start a shell.

cd /etc/systemd/network

There you will find all the network config files.

Typically you will have just one, named “10-eth0.network”.

The contents of this file are relatively self explanatory:

[Match]
Name=eth0
 
[Network]
Gateway=192.168.1.254
Address=192.168.1.40/24
DHCP=no
 
[DHCP]
UseDNS=false

Add a new section at the bottom of the file using your favourite text editor:

[Route]
Gateway=192.168.1.20
Destination=192.168.2.0/24

Again, the format for this is pretty obvious.
Once that’s saved, run:

systemctl restart systemd-networkd

Check that your route has taken using

root@vc01 [ ~ ]# ip route show
default via 192.168.1.254 dev eth0  proto static
192.168.1.0/24 dev eth0  proto kernel  scope link  src 192.168.1.40
192.168.2.0/24 via 192.168.1.20 dev eth0  proto static
VMware ESXi 6.0 Update 2 – Host Client “Service Unavailable” error

I’ve recently upgraded my home lab ESXi hosts to ESXi 6.0 Update 2 (6.0u2).

One of the features added is the VMware Host Client – an HTML5 standalone web interface for managing an ESXi host. This has been available as a VMware Labs “Fling” for a while but it’s now part of the default installation. It allows you to manage a standalone ESXi server without needing vCenter or the Windows-only vSphere Client (aka the C# client).

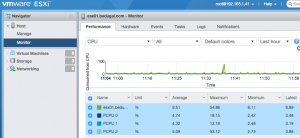
ESXi Host Client screenshot

When I tried to access the new client (https://[yourhost-ip-or-name]/ui/) , I was faced with an error:

503 Service Unavailable (Failed to connect to endpoint: [N7Vmacore4Http16LocalServiceSpecE:0x1f0a2c70] _serverNamespace = /ui _isRedirect = false _port = 8308)

A bit of web searching brought me to a blog article by the ever-comprehensive William Lam about an issue with the original Fling when installing on a host which has been upgraded from ESXi 5.5 or earlier.

Part of the Reverse HTTP Proxy config does not get updated during the upgrade, leaving the new UI broken.

The fix is:

  1. Log on to your ESXi host (either via SSH or DCUI/ESXi Shell)
  2. Edit /etc/vmware/rhttpproxy/endpoints.conf
  3. Remove the line:
    /ui    local    8308    redirect    allow
  4. Now restart the rhttpproxy:
    /etc/init.d/rhttpproxy restart
  5. You should now be able to access the Host Client at https://[yourhost-ip-or-name]/ui/

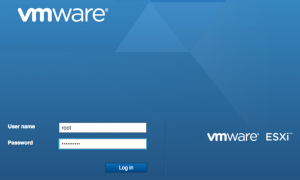
ESXi Host Client login

VMware Distributed Virtual Switches with single-NIC hosts

Home Lab

I have a small Home Lab for vSphere, based on two Intel NUC hosts running ESXi and an HP Microserver running FreeNAS, presenting datastores as iSCSI LUNs to the hosts.

The vCenter is a vCenter Server Appliance (VCSA) running on one of the ESXi hosts.

The initial setup was fairly straightforward and you can find plenty of other people who have done similar things.

The Problem

One of the difficulties/limitations of using the Intel NUC is that each machine has a singe NIC. That makes creating a Distributed Virtual Switch (DvS) quite difficult as when migrating the host running vCenter to the DvS, the vCenter loses contact with the host and rolls back the migration.

I figured I could live with standard switches, and if I really needed to use DvS I could use nested ESXi with multiple virtual NICs.

A Workaround

Recently I discovered an excellent blog article by Larus Hjartarson titled “vCenter & Distributed vSwitch on two ESXi hosts with a single NIC“. This suggests a workaround for the migration issue mentioned above.

The outline of the workaround is:

  1. Create the DvS on the host that doesn’t run vCenter.
  2. Move that ESXi host  to the Distributed vSwitch. Create VM traffic portgroups.
  3. Clone the vCenter VM and place it on the ESXi host that doesn’t run the vCenter VM.
  4. Connect the newly cloned vCenter VM to a Distributed Portgroup on the ESXi host (that was connected to the DVS previously)
  5. Turn off the original vCenter.
  6. Turn on the cloned vCenter and configure the network settings
  7. Move the other host to the Distributed switch.

Some things I encountered which might help others attempting this:

VCSA changes MAC address when cloned

If you’re using the VCSA for your vCenter, when you clone it the MAC address changes so it won’t come up properly. There’s a VMware KB article on how to work around that:
http://kb.vmware.com/kb/2012451 – basically you edit the /etc/udev/rules.d/70-persistent-net.rules file so that the new MAC address is associated with eth0.

iSCSI vmknics cannot be migrated

If you’re using iSCSI-based storage, you cannot migrate a host to the DvS until you remove the vmknic from the software iSCSI adapter, which means having no iSCSI-stored VMs running on the host at the time.

You can’t vMotion the VMs to the other host as they’re on a standard vSwitch and the other host is on a DvS. Even if you leave the old standard vSwitch in place on the other host, vMotion will still abort as it sees the old portgroup as a “virtual intranet” (i.e. no uplinks). So you have to shut down the VMs to move them. That’s when it becomes important to either have two DNS servers, DNS served outside your VMware setup or your host names in the vCenter hosts file.

VMware do have an KnowledgeBase article on the “virtual intranet” problem which has a workaround based on editing the vCenter config file but I have not tried that.

I hope that information proves useful to anyone else using single-NIC hosts for a Home Lab.  Obviously I wouldn’t recommend doing any of this on a production environment, but then I’d hope that a production environment wouldn’t be using single-NIC hosts anyway!

VMware Workstation: Cannot open VMparport driver for LPTx

Recently came across a problem when trying to access a parallel port dongle from a Workstation machine.

The VM was configured with a virtual parallel port, and the host machine had a PCI parallel port card installed which was recognised by the host OS (Windows 7 in this case).

Every time the VM was started, Workstation threw an error along the lines of:

Cannot open VMparport driver for LPT3:
Failed to connect virtual device parallel0

After looking round the VMware Communities for a while, I found the solution.

The PCI Parallel Port card was installed after VMware Workstation. During the Workstation installation process, the installer looks to see whether the host has a parallel port, and if it does it installs a driver allowing VMs to access the port. If there’s no parallel port, the driver doesn’t get installed.

The problem here is that if you add a parallel port afterwards, there’s no virtualisation driver for it, resulting in the error above.

The solution is to uninstall and reinstall VMware Workstation after the hardware change. Reinstalling doesn’t affect any settings or VMs as long as you tell the uninstall process not to delete anything.

This probably applies for VMware Server and Player too.

vSphere PowerCLI: Moved your ISO datastore ? Reconnecting your CD-ROM drives

We recently moved our ISO store from a legacy NFS server to our main NFS filer.

The first task was copying the actual files, which can be done via any machine that has both datastores mounted (with read-write access to the destination store).

The more significant job is reconfiguring the VMs to use the copies of the ISOs in the new datastore.

Here’s the PowerCLI script I used:

  1. #
  2. # Disconnect all CD/DVD ISOs on a particular datastore and reconnect them to the new datastore
  3. #
  4. $myvcenter = "myvcenter.host.net"
  5. $mydatacenter = "BigDC1"
  6. $originalISOstore = "MyFirstISOstore"
  7. $finalISOstore = "MuchBetterISOstore"
  8.  
  9. Connect-VIServer $myvcenter
  10.  
  11. (Get-VM -Location: (Get-Datacenter $mydatacenter)) | ForEach ( $_ ) 
  12. 	{ 
  13. 	$myDrive = Get-CDDrive $_
  14. 	if ($myDrive.IsoPath -match "\["+$originalISOstore+"\]") 
  15. 		{
  16. 		Set-CDDrive -CD $myDrive -IsoPath ($myDrive.IsoPath -replace $originalISOstore, $finalISOstore) -Confirm:$false  
  17. 		} 
  18. 	}
  19. Disconnect-VIServer $myvcenter -confirm:$false

It’s fairly self-explanatory.

The biggest caveat with this is that it assumes that the source and destination stores have the same structure, but it wouldn’t be difficult to amend it to change the destination path slightly.

vSphere Bugs & Minor Irritations

I’ve recently reported a couple of annoying bugs to VMware. Both have been around for a long time, almost certainly since the days of Virtual Center 2.0, maybe even earlier.

  • If a VM has nothing in the “Notes” annotation, vCenter displays the “Notes” from the previously selected VM instead.
    So if you have a machine with a note saying “Delete after 1st Jan 2011”, and you then view the summary of a machine with no note set, it’ll display the “Delete after 1st Jan 2011”. That could be bad…
    The problem only occurs if the VM has never had any Notes annotation. If you set one and then remove it, it shows the blank note correctly.
    **UPDATE**This appears to be fixed in 4.1 U1 – it only seems to affect VMs which were deployed without notes under VirtualCenter 2.x.
  • When deploying a VM from a template, the Tasks & Events history doesn’t correctly name the template from which the VM was deployed.
    As you can see in the example image, vCenter lists the deployed VM name instead of the template. 

Click for full size

** UPDATE ** VMware have acknowledged this as a bug but it will not be fixed until vSphere 5, later this year.

And there’s a cosmetic thing which winds me up. I haven’t reported it as a bug but if anyone from VMware reads this, maybe they can have a word. It’s really trivial….

Send Ctrl-Alt-del“. What has “del” done to deprive it of a capital “D”?

VMware Fusion also has a “Send Ctrl-Alt-Del” menu option but it gets the capitalisation right. I can only offer this as proof that Macs are better than PCs… or something.

vSphere HA Slot Sizes

vSphere HA slot sizes are used to calculate the number of VMs that can be powered on in an HA cluster with “Host failures cluster tolerates” selected. The slots size is calculated based on the size of reservations on the VMs in the cluster. HA Admission Control then prevents new VMs being powered on if it would not leave any slots available should a host fail.

The slot size for a cluster can be seen by going to the Summary Page for the cluster and clicking the “Advanced Runtime Info” link in the HA box.

If none of the VMs have CPU or RAM reservations, a default of 256MHz and 0GB is used.

The slots per host is derived by taking the total available CPU/RAM for the host and dividing by the slot size. Some CPU is reserved for the system so it will usually be a little lower than the full amount. So a host with 2xquad-core 2.4GHz CPUs (total 19.2GHz) and no VM CPU or RAM reservations has 73 slots and will only allow 73 VMs to be powered on if the cluster has two hosts and is set to protect against a single host failure.

Obviously this allows a very minimal amount of resource for each VM, so either reservations should be set for each VM, or slots size can be manually adjusted (see the VMware vSphere Availability Guide (pdf) for full details).

Note that the slot size is used for admission control calculations only. It has no direct effect on the resources available to VMs should an HA event occur.

There is a VMware Knowledgebase article (1010594) which  has some details of the difference in VI3 and vSphere 4.x.

vSphere: Attempting to add NFS datastore – “Error performing operation: Unable to create object, volume Name not valid”

We’ve had this error on ESX 3.5 and 4.0 hosts, both ESX and ESXi.
When trying to add a new NFS datastore we get the above error message, both in the vSphere Client and when using the command-line tools.

Logging on to the Service Console on an affected host, “esxcfg-nas -l” also results in the same error.

The cause is invalid entries in the /etc/vmware/esx.conf file. Fortunately, it seems to be possible to remove the bad entries and the host then starts working properly without a reboot.

In our case, the bad entries looked like:
/nas/./enabled = "false"
/nas/./host = "1"
/nas/./share = "0"

whereas valid entries are recognisable:
/nas/vmdesktop/enabled = "true"
/nas/vmdesktop/host = "10.0.0.100"
/nas/vmdesktop/readOnly = "false"
/nas/vmdesktop/share = "/vol/vmdesktop"

As I mention above, fixing it on ESX isn’t too hard, just edit /etc/vmware/esx.conf using nano or vi as root, being careful not to affect any other lines.

On ESXi, it’s a little more tricky as you can’t readily log on and edit files without enabling Technical Support mode.

It is, however, possible to edit esx.conf via the Remote CLI (Linux or Windows) or using the vMA.

Below are some example commands which grabs the esx.conf file, edit it using ‘sed’, and then put the altered file back on the host.

vifs -get /host/esx.conf work.conf
cat work.conf | sed -e '/\/nas\/\./d' > fixed.conf
vifs.pl -put fixed.conf /host/esx.conf

The ‘sed’ command will probably need to change for you, depending on what the invalid lines look like. You can just use nano or vi on Linux or the vMA to do the edit, but if you’re using Windows you may find that Notepad and Wordpad either don’t display the file clearly or convert the line endings from Unix format to DOS. Using the free VIM for Windows (http://www.vim.org/download.php) will let you keep the file in the same format.

After making those changes, it was possible to add NFS datastores as normal.

Add multiple datastores to multiple vSphere hosts

In large vSphere environments it can be very tedious to add multiple NFS datastores to lots of hosts.
PowerCLI comes to the rescue as usual.

I needed to add some datastores to all the clustered hosts in a single datacenter, but to skip our non-clustered standalone hosts which are used for backups.

A bit of PowerCLI which should be fairly self-explanatory:

  1. #
  2. #  Add Datastores to all hosts in all clusters in a specified datacenter
  3. #  If a host isn't in a cluster it won't get the datastore
  4. #  Easy enough to change to do all hosts in a datacenter, all in vCenter etc
  5. #
  6. #  Change the value below to point it to your own vCenter
  7. $myvCenter = "vcenter.example.com"
  8.  
  9. # Array of arrays below holds NFS-hostname, NFS-path and Datastore name, should be easy to add to
  10. $nfsArray = @(
  11. 			  @("nfsserver1","/vol/nfspath1","VMstore1"),
  12. 			  @("nfsserver2","/vol/nfspath2","VMstore2"),
  13. 			  @("nfsserver3","/vol/nfspath3","VMstore3")
  14. 			 )
  15.  
  16. $datacenter = Read-Host -Prompt "Datacenter name"
  17.  
  18. Write-Host "Datacenter is $datacenter"
  19.  
  20. connect-viserver -server $myvCenter
  21.  
  22. #
  23. # Get all hosts in all clusters in the named datacenter
  24. $ObjAllHosts = get-datacenter -name $datacenter | Get-Cluster  |  Get-VMHost 
  25.  
  26. ForEach($objHost in $ObjAllHosts){
  27. 	ForEach($nfsItem in $nfsArray) {
  28.  
  29.       Write-Host "Adding datastore" $nfsItem[2] "with path" $nfsItem[0]":"$nfsItem[1] "to" $objHost
  30.       New-Datastore -Nfs -NfsHost $nfsItem[0] -Path $nfsItem[1] -Name $nfsItem[2] -VMHost (Get-VMHost $objHost)
  31.     }
  32. }
  33. disconnect-viserver -server $myvCenter -Confirm:$false

vSphere 4.1 ESXi Installable on USB?

Looking at the ESXi Installable Setup guides for 4.1 and 4.0 reveals a change. In 4.0 under System Requirements, a USB drive was listed as a possible boot device, as well as being usable for installation. So you could stick in your installation media and select USB as the destination.

Under 4.1, USB is no longer listed in the documentation as a bootable device, though boot from SAN devices via HBAs is now supported.

I’ve not checked whether you can actually install ESXi Installable 4.1 to a USB drive. It may well be possible, but I suspect it’s dropped off the “Supported” list of options.

The only reason I can see to drop support for putting Installable onto USB is to encourage people to purchase and use ESXi Embedded from their hardware supplier instead.

**UPDATE 2nd March 2011**

VMware have posted a clarification Knowledgebase article about the support for USB and SD for booting ESXi.

You can install ESXi 4.x to a USB or SD flash storage device directly attached to the server. This option is intended to allow you to gain experience with deploying a virtualized server without relying on traditional hard disks. However, VMware supports this option only under these conditions:
  • The server on which you want to install ESXi 4.x is on the ESXi 4.x Hardware Compatibility Guide.

    AND

  • You have purchased a server with ESXi 4.x Embedded on the server from a certified vendor.

    OR

  • You have used a USB or SD flash device that is approved by the server vendor for the particular server model on which you want to install ESXi 4.x on a USB or SD flash storage device.

If you intend to install ESXi 4.x on a USB or SD flash storage device while ensuring VMware support for it and you have not purchased a server with embedded ESXi 4.x, consult your server vendor for the appropriate choice of a USB or SD flash storage device.

So as I suspected, it’s only supported if you install either using “Embedded” or on a device approved by the server vendor.

It does work absolutely fine on a normal USB stick, the host that this web server runs from boots from such an item in fact. It’s just not supported by VMware.

Worth noting that an approved 2GB USB stick from HP will cost you approx £75, about 15 times the going rate…